Thursday, December 15, 2011

Our alien

We finally got a face shot of Baby Q. She's looking a lot like an alien but I'm in love with her anyway.
Posted by Picasa

Wednesday, November 2, 2011

Another Rag Quilt


Well the baby is still a girl so I'm getting into nesting mode and making her bedding. I finished her rag quilt and I'll start on the rest of her bedding next week. I saw this picture and decided to base the look of her bedding off of it.

Here's baby Q's quilt.

Wednesday, October 12, 2011

Raq Quilts

I really wanted to make a quilt for my new little one, who is a girl, BTW. But I'm horrible at binding quilts so I decided to make a rag quilt. I used this tutorial. The only difference it that I sewed an "x" through the two pieces of flannel rather than sewing along all the edges.

I made my first rag quilt for DD and I'm happy to say that she has abandoned her other 3 blankets and now only uses the quilt I made her.

I really thought this baby was going to be a boy and I had the fabric picked out for his blanket but refused to buy any until I knew for sure. I'm sure glad I didn't buy it and now I have to find fabric that will go with the blue and red mickey (the only mickey flannel I could find) and have it still be girly.

While looking for fabric on Saturday my mom spotted some breast cancer fabric and asked me to make a quilt for her. It's much larger than DD's but it only took me 2 days and it turned out great. This time I had the help of these beauties: which makes it SOOOOOOO much easier. The worst part of making a rag quilt is having to snip all around the seems, and using regular scissors kill your hand but these spring loaded snips made it a breeze.

It was surprisingly difficult for me to design a "random" pattern. I blame my OCD.


Here's mom's finished quilt. And per her request I also made her a heating pad to lay across her chest.
I have another ultra sound coming up and I'm waiting to know that this baby didn't grow some boy parts (I wouldn't be upset if that happened, I'd be thrilled) before I start on the baby's quilt. I'm excited!

Birthday Plaques, pt.2


I finally finished MIL's birthday plaque. Of course, It's Mickey colors.

Thursday, September 8, 2011

Dressers

I am the type that starts nesting REALLY, REALLY early. DD's room was done before I was even 15 weeks along. Since we have all the basics I only have a few things on my list. 1) cloth diapers 2) clothes (if it's a boy like we think it is) and 3) two dressers to replace DD's one.

I wanted two taller 4 or 5-drawer dressers hoping it would take up the same space as DD's short long dresser. I did a lot of internet shopping before I found the one I wanted. I had a few requirements. It had to have metal runners, it had to be sturdy, it had to be big enough, it had to be under $150, and it had to be white. Most of the dressers I found under $150 had bad reviews saying it was flimsy and cheap.

I found one at Shopko that had metal runners and a safety mechanism that only allows one drawer to be open at a time. LOVE that feature with little kids! (Does it drive everyone else nuts when they walk into your kids' room to find that the kiddos have been rummaging through the drawers and left them all open!?) This dresser was originally $260 but it was on sale for $130. I took hubby to see it and make sure he approved. Instead of taking a gamble on 2 dressers we decided to get one for DD now and make sure we like it. We've got 6 more months to get another (however I'm already accumulating stuff for the little one and I need a dresser keep it all in. We may be getting another sooner than we thought! DH will be so thrilled when I tell him...)

It took DH two or three hours to put together but it's very, very sturdy, and quite heavy. It's definitely not a Wal-mart piece of junk. Since it is so heavy I'm really glad it had the only-one-drawer-open-at-a-time feature.

I love it! The one down side has been that we've gone down from six drawers to four.

To give it a little more organization I went to Lowes and had them cut some poplar board down to the length of the drawer so I could make permanent dividers. Poplar board is so cheap, about $1.50 for 2 feet. I came home and debated what kind of glue to use to secure it. I thought about gorilla glue but it foams up so ugly. I thought about wood glue but then DH suggested silicone. It worked perfectly (and we lucked out that the poplar board is the same color as the inside of the drawers!

So instead of this:
We have this:

And DD's socks, misc stuff and panties are organized like this:
LOVE it!

Wednesday, September 7, 2011

Announcement!


After going through the torture of this past year it's been hard to believe that this is real. But we feel good about this and rather than worry, I decided to just have faith that this little one will be born healthy and strong. The Lord's timing has been a huge blessing. My mom was diagnosed with breast cancer shortly after I found out I was pregnant. This pregnancy has given my mom something to look forward to and keep her hopes up.

We're so grateful for this huge blessing. It's been a good reminder of a quote I love, "Faith in the Lord includes faith in His timing."

Tuesday, September 6, 2011

Birthday Plaques

For the sake of coming up with birthday gifts I am lucky to have my mom and my MIL's birthdays 9 days apart. And my dad's and my FIL's birthdays are also 9 days apart. Convenient, huh?

This year for my moms, I'm giving them birthday plaques. This is my mom's and MIL's is almost finished.

MIL's will have a totally different color scheme. *cough* Mickey Mouse *cough*. Now I just need to get the energy to make one for myself. Why is that always the hardest to do?

Red Velvet Cheesecake Brownies and Banana Bread

I found these red velvet cheesecake brownies on Pinterest and I've made them several times now. I can't describe how awesome they are! They come from this site

And they're really easy too!

Ingredients:

  1. 1/2 cup butter
  2. 2-oz dark chocolate, coarsely chopped
  3. 1 cup sugar
  4. 2 large eggs
  5. 1 tsp vanilla extract
  6. 1 1/2 tsp red food coloring
  7. 2/3 cup all purpose flour
  8. 1/4 tsp salt
  9. 8-oz cream cheese, room temperature
  10. 1/3 cup sugar
  11. 1 large egg
  12. 1/2 tsp vanilla extract

Directions:

  1. Preheat oven to 350F. Butter the bottom and sides of a 8 inch metal baking pan. Put a long piece of parchment paper in the bottom of the pan, letting the parchment extend up two sides of the pan and overhang slightly on both ends. (This will make it easy to remove the bars from the pan after they have baked.) Butter the parchment.
  2. In a small, heatproof bowl, melt butter and chocolate together. Stir until combined and very smooth. Set aside to cool for a few minutes.
  3. In a large bowl, whisk together sugar, eggs, vanilla extract and red food coloring. Add chocolate mixture and stir until smooth. Add flour and salt and stir until just combined and no streaks of dry ingredients remain.
  4. Pour into prepared pan and spread into an even layer.
  5. To prepare cheesecake mixture, beat cream cheese, sugar, egg and vanilla extract in a medium bowl until smooth. Distribute the cheesecake mixture in 8 dollops over batter in the pan. Swirl in with a knife or spatula.
  6. Bake for 35-40 minutes (mine always take 45-50 minutes), until brownies and cheesecake are set. A knife inserted into the cheesecake mixture should come out clean and the edges will be lightly browned.
  7. Let cool completely in pan on a cooling rack before lifting out the parchment paper to remove the brownies. (Hard to do but very important!)

Yields: 16 large brownies or 24 small brownies


I also had a craving for my mom's banana bread and these days, when I have a craving, I HAVE TO have it!NOW! :)

Ingredients

½ cup margarine

1 cup sugar

2 eggs

1 cup mashed bananas

¼ cup milk

1 tsp. lemon juice

2 cups flour

1½ tsp. baking powder

½ tsp. baking soda

¼ tsp. salt

½ cup nuts (optional)

1/2 cup chocolate chips (optional)

Directions

Cream margarine and sugar. Add eggs and beat. Add bananas, milk and lemon juice.

Sift dry ingredients and add to wet mixture. Add nuts or chocolate chips.

Bake in well-greased 8x4x3 loaf pan for 1 hour at 350°, or until a toothpick comes out clean.


Posted by Picasa

Monday, September 5, 2011

Ruler growth chart

My sis-in-law had her little boy Malcolm about a month ago. As the due date approached I frantically worked on one more project, only to have it fail miserably and have to start again. Ugh. But the second one turned out just as I had hoped so I can't complain too much.


I love growth charts and I chose this style because I really love that it looks like a giant ruler. And they'll go with any decor.

They're really quite easy to make, if you don't screw up and have to start again. :)

Step one: measure out all your lines. My handy dandy sewing ruler was great for this since I could see through the plastic and make sure I was on target.

Step two: MEASURE AGAIN!

Step three: get your trusty wood burner and try not to burn yourself! I liked the tip you can see in this picture because it was really easy to make a straight line.

Step four: make a template of your numbers and lettering and trace them where you want them to end up. On a spare piece of wood try out the different tips for your wood burner so you can see what you like best. Curved number lines are much more difficult than the straight inch marks. Then CAREFULLY burn in your numbers and letters. BTW, I chose to go with their last name instead of the baby's name since I didn't think that years down the road they'd want 3 or 4 of these around their house. And I think it's fun to keep all the family's heights in one location.

Step five (optional) apply a wood stain to your wood. Then try to sand off the stain and realize it's useless.

Repeat steps one - four since the wood stain looked absolutely awful! :)


Step six: seal your wood with spray sealer.

Just to compare: the good and the bad.

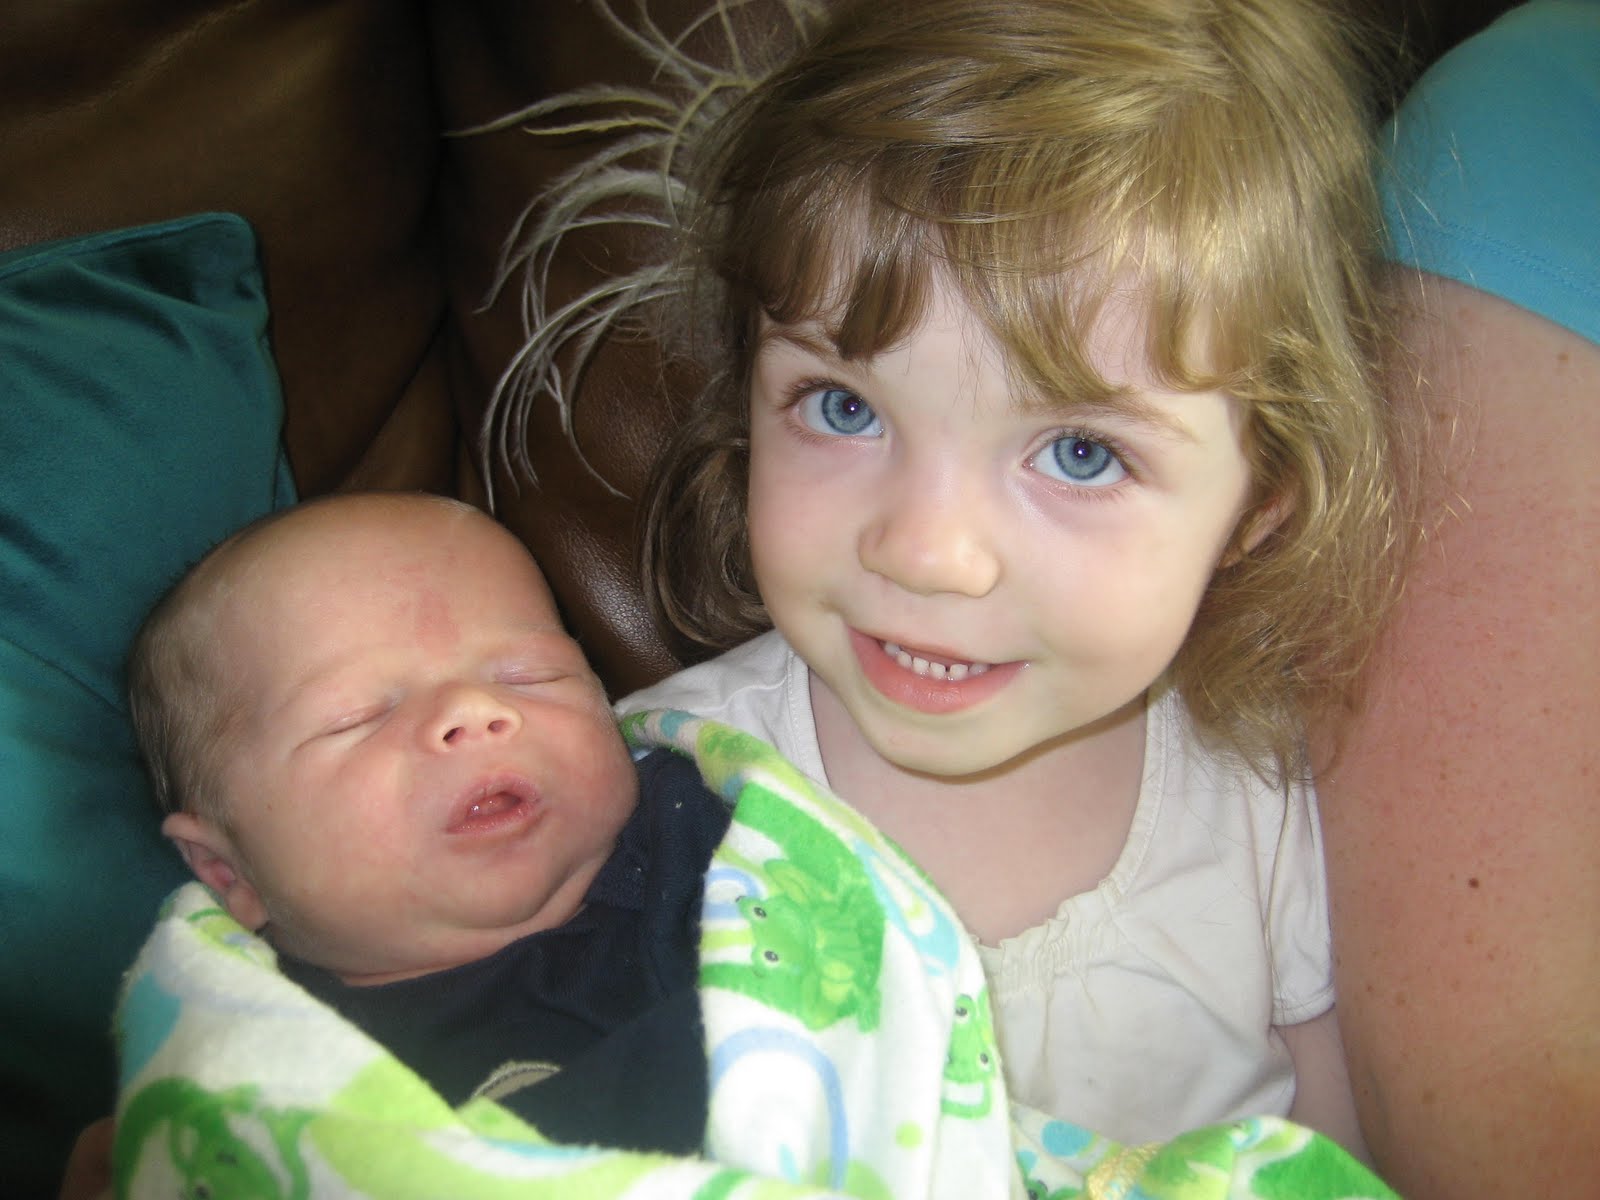
DD with cousin Malcolm. Finally a cousin on this side of the family!

Posted by Picasa

Tuesday, July 12, 2011

Keeping a fridge organized

I ran across a tip junkie facebook post a while back about a fridge that was organized with baskets. I loved it but then forgot. 2 months ago I was deep cleaning the fridge and as I put things back I decided to give the baskets a try. I LOVE them. This picture was taken today and it looks pretty much the same as it did two months ago. DH recently said how much he loves how the baskets help keep the fridge organized (and for him to notice that's a BIG deal) . I've found that we harldy waste any food because it's so easy to see what we have and what leftovers need to be eaten.

The baskets with handles are from Wal-Mart. $1.50 for the small ones and $2.50 for the big ones.

Brag Board


Last year for mother day
I made some brag boards for our moms but the one I had for DH's mom got damaged in transit so I never gave it to her. I wanted to give it another try this year and ended up giving her this. Instead of using the ghetto clothespins , I used sheet metal and magnets. MIL is in love with bottle cap magnets and has become quite expert at making them, so I figured that if she put this sign up in her office she could show off grandkid pics as well as her bottlecaps.


Posted by Picasa

Lemon Gelato

My BFF made this for a summer BBQ 3 years ago when we were both pregnant. It has become my favorite summer dessert. The lemon flavor is very strong and it's not overly sweet, but that's what makes it so refreshing. If you have an ice cream maker, this is a quick, super easy summer dessert.

Lemon Gelato

1 cup milk

1 cup sugar

5 egg yolks, beaten

3 Tbsp. grated lemon zest

¾ cup fresh lemon juice (5-6 lemons)

2 c. heavy whipping cream


Scald milk. Add sugar and cook until dissolved. Temper eggs then add all eggs to mixture. Add zest. Cook until thickened to a custard-like consistency. Remove from heat. Stir in lemon juice. Place pan in ice water. Stir in cream. Cover and refrigerate for several hours or overnight.* Transfer to ice cream maker and mix until an ice-cream consistency is achieved.

*May be placed in freezer for an hour instead of refrigerator.


Monday, July 11, 2011

Subway Sauces

DH LOVES LOVE LOVES sauces. He's always experimenting and coming up with new concoctions. That's why our fridge is mostly condiments:)
On Sunday night he was craving a Sweet Onion Chicken Teriyaki sandwich from Subway, and since it was Sunday we of course weren't going to go get one, so we started researching recipes. By the time I found some good recipes, he had munched on something and wasn't hungry anymore, but I got really excited about our two favorite sauces, the sweet onion sauce and the southwest chipotle. (Try the sweet onion chicken teriyaki with just a small strip of the chipotle sauce, and lots of sweet onion sauce. It's divine!) I was only missing a couple ingredients so I got them today and whipped up these sauces tonight. They were both super duper easy but the sweet onion sauce has a rather strange ingredient that I wouldn't think most people have laying around. This buttermilk powder can be found on the baking isle, but not knowing what it looked like, I honestly wouldn't have found it. Luckily my friend spotted it.

Sweet Onion Sauce

  • 1 cup light corn syrup
  • 2 tablespoons minced white onion
  • 2 tablespoons red wine vinegar
  • 4 teaspoons white distilled vinegar
  • 2 teaspoon balsamic vinegar
  • 2 teaspoon brown sugar
  • 2 teaspoon buttermilk baking mix
  • 1/2teaspoon lemon juice
  • 1/4 teaspoon poppy seed
  • 1/4 teaspoon salt
  • pinch cracked black pepper
  • pinch garlic powder

  • Combine all ingredients. Bring to boil. Whisk well. Cool and store in refrigerator.

    I used 1 Tbsp. of dried minced onion instead but I'm anxious to try it with the fresh onion.


    Southwest Chipotle Sauce


  • 1 cup mayonnaise
  • 1 Tbsp. Dijon mustard
  • 1 Tbsp freshly squeezed lime juice
  • 1 ounce pureed chipotle chile in adobo
  • 1 tsp. fresh garlic, minced
  • salt, to taste

  • Combine all ingredients and refrigerate.


    I was trying to find some fancy glass bottles but settled on these for now. But really these will work better than glass since they can be squeezed.

    So tomorrow night's dinner is homemade Sweet Onion Chicken Teriyaki sandwiches!!! We're excited. DH just needs to find Subways Italian Herb and Cheese bread recipe.
    Posted by Picasa

    Monday, July 4, 2011

    Ribs

    We were stuck at home working for the mortuary today while the rest of our family celebrated Independence Day. So in an effort to not feel sorry for ourselves, we had our friends over for dinner. DH decided to try his hand at beef ribs. (We're not pork eaters) They were fall-off-the-bone incredible!

    He came up with this sauce on his own. He loves to get as many spices into a sauce as he can, luckily I was taking notes so I was able to write up a recipe. Like any good ribs, these take quite a while, but they're worth it!

    5 lbs. beef ribs
    3-4 garlic cloves
    1/2 onion, minced
    2 Tbsp. vegetable oil
    14 oz. ketchup
    1/2 cup honey
    2-3 Tbsp. balsamic vinegar
    2 Tbsp. Worcestershire
    2 Tbsp. liquid smoke
    1 Tbsp. spicy brown mustard
    1/4 tsp. cinnamon
    1/4 - 1/8 tsp. ground clove
    1 tsp. black pepper
    1/2 tsp. seasoning salt
    1/2 tsp. tarragon
    1/8 - 1/4 tsp. ground sage
    3 drops green Tabasco

    Saute garlic and onions in oil.
    Stir in ketchup, honey and vinegar.
    Add remaining ingredients.
    Bring to boil.
    Reduce heat and simmer for 30 minutes.
    Slather ribs in sauce and refrigerate for 24 hours.
    Preheat oven to 280°. Place ribs in a roasting pan and cover. Bake for 2 1/2 hours then reduce heat to 200°for 1 to 1 1/2 hours.
    Remove ribs and keep covered. Let sit for an about an hour.
    Just before serving, place ribs on a preheated grill for 2-3 minutes on each side, just enough sear the ribs.

    Sunday, June 19, 2011

    Baby Gifts

    Now that my SILs shower is over I can post some of the things I've been working on. I made a diaper cake and had a basket of homemade goodies. But I was in such a rush to get these gifts to the host's house that I forgot to take pictures of everything. But here are a few.


    This one is my fav :)


    I saw this corny applique at JoAnns and I debated using it but DH convinced me. The other side of the shirt says something about "Reuse, Recycle...." I don't remember exactly, and the back says "Be Green." Well, the baby's last name is Green and his mama is into "being green" so DH thought it would be hilarious.

    This is Make It-Love It's pattern for a nursing cover with one little add-on:

    On the corners I added some minky fabric. I liked having a little pocket there for a nursing shield, and having something absorbant since, lets face it, you have to dry off after feeding the little one.

    I made some Wee Wee Wigwam's and Binky clips, among other things. We're so excited to welcome our little unnamed nephew into the family next month!
    Posted by Picasa

    Monday, May 30, 2011

    Forgetful me

    I recently got my car door fixed. Hallelujah! And while cleaning it out I found several things I forgot were in there. I'm sure when I put things there I thought I'd remember where I left them, but that doesn't work out so well.


    So I know it's corny to put vinyl lettering in the car, but if I didn't I'd forget what's in there.

    You have no idea how happy I am to have this:

    A back door that opens!

    Word to the wise, if a can of soda explodes in your can and the sticky sugar somehow makes the weather stripping come out of place, fix it before the weather stripping gets caught in the latch and you can't open your back door:) It's not fun to pay $96/hr. for a mechanic to prise your door open.


    Posted by Picasa